Working with Images in OpenCV using Python
Basic operations with images in OpenCV using Python
OpenCV is one of the most common libraries that you need in any computer vision or image processing task. Before applying different filters for image processing or to perform any image-related task, you must know how to read an image, display an image, or write an image.
#more
OpenCV comes with built-in functions to perform these basic operations. Let’s see how you can use these functions in your task.
Before performing any operation, make sure you have OpenCV, Numpy, and Matplotlib (optional) in your system. OpenCV uses Numpy in the backend and Matplotlib is required for displaying images. You can follow our OpenCV Intro Guide to see how you can install it.
This is the original image that is going to be used here:
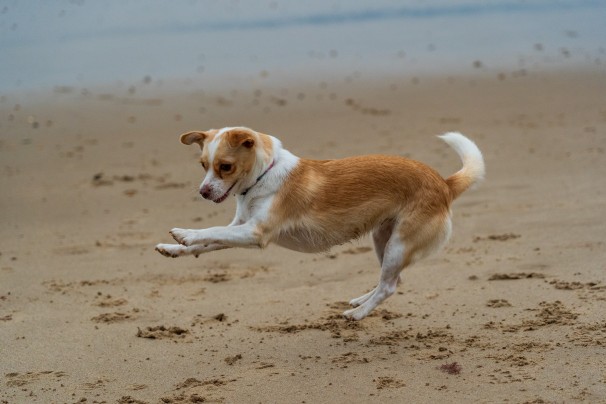
Photo by Nick Fewings on Unsplash.
Reading an Image
OpenCV has a built-in function that will read/load/open an image which is cv2.imread(). Let’s see the syntax:
import cv2
cv2.imread(Pathname, Flag)
It consists of two arguments:
-
Pathname: It contains the pathname of the image to be read. Make sure your image should be in the same directory or the full pathname of the image should be specified, otherwise you will get an empty matrix.
-
Flag: It is an optional argument. It sets the format of the image in a way you want to be read. There are three types of flags:
cv2.IMREAD_COLOR or 1:
This will read the image in a colored mode by removing any transparency from the image. OpenCV loads the color image in a BGR 8-bit format. This flag is used by default.
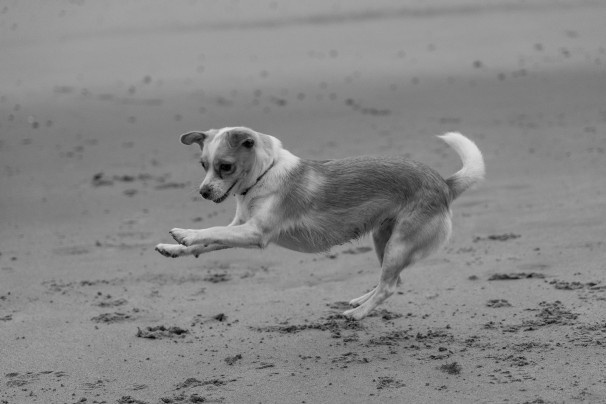
cv2.IMREAD_GRAYSCALE or 0:
This will read the image in a grayscale mode.
cv2.IMREAD_UNCHANGED or -1:
This will read the image as it is including the alpha channel if it is present.
Let’s see how you can read an image by using three different flags:
img_colored = cv2.imread('dog.jpg', 1)
img_grayscale = cv2.imread('dog.jpg', 0)
img_unchanged = cv2.imread('dog.jpg', -1)
The loaded image object will be a numpy ndarray. You can get its dimensions by using .shape. Be careful since it returns the height first, then the width, and for non-grayscale images it also returns the number of color channels:
img_colored = cv2.imread('dog.jpg', 1)
height, width, num_channels = img.shape
print(type(img_colored))
print(height, width, num_channels)
# <class 'numpy.ndarray'>
# 404 606 3


img_grayscale = cv2.imread('dog.jpg', 0)
# only height and width for grayscale
height, width = img.shape
Displaying an Image
OpenCV has a built-in function that will display an image in a window which is cv2.imshow(). Let’s see the syntax:
cv2.imshow(WindowName, Image)
It consists of two arguments:
- WindowName: It specifies the name of the window which contains the image. This will help you to display multiple images at a time, you can specify different window names for every image.
- Image: It is the image that will be displayed.
There are other functions that are used along with this function.
- cv2.waitKey(): It will display the window on the screen for the time period which is in milliseconds. The value should be a positive integer. If the value is 0, It will hold the window indefinitely until you press a key.
- cv2.destroyAllWindows(): It will destroy all the open windows from the screen and from the memory which was created.
- cv2.destroyWindow(): It will destroy the specific window. The argument will be a window name that you want to be destroyed.
Let's see how it looks:
img_colored = cv2.imread('dog.jpg', 1)
cv2.imshow('Grayscale Image', img_colored)

img_colored = cv2.imread('dog.jpg', 1)
img_grayscale = cv2.imread('dog.jpg', 0)
cv2.imshow('Grayscale Image', img_grayscale)
Writing an Image
OpenCV has a built-in function that will write/save an image to the given path which is cv2.imwrite(). It will save your image in the working directory. Let’s see the syntax:
cv2.imshow(FileName, Image)
It consists of two arguments:
- FileName: It contains the name of the file which should be in the .jpg, .png, etc format.
- Image: It is the name of the image that will be saved.
To sum it up, you will see an example that will load an image in grayscale, displays it, and then saves it.
import cv2

# Reading an image
img_gray = cv2.imread('dog.jpg', 0)

# Display an image in a window
cv2.imshow('Grayscale Image', img_gray)

# Wait for a keystroke
cv2.waitKey(0)

# Destroy all the windows
cv2.destroyAllWindows()

# Write an image
cv2.imwrite('dog_grayscale.jpg', img_gray)
Drawing and working with images
You can use different functions to draw shapes and text in an image:
cv2.linecv2.rectanglecv2.circlecv2.ellipsecv2.polylinescv2.putText
import numpy as np
import cv2
# Load an color image in grayscale
img = cv2.imread('dog.jpg', 1)
height, width, channels = img.shape
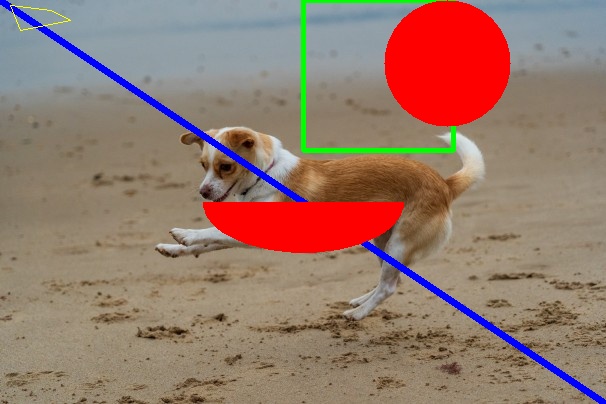
# Draw a diagonal blue line with thickness of 5 px
img = cv2.line(img, (0, 0), (width-1,height-1), (255, 0, 0), 5)
# Rectangle: pt1, pt2, color, thickness
x1 = width // 2
img = cv2.rectangle(img, (x1, 0), (x1 + 150, 150), (0, 255, 0), 3)
# Circle: center, radius, color, thickness, -1=fill
img = cv2.circle(img, (447, 63), 63, (0, 0, 255), -1)
# Ellipse
img = cv2.ellipse(img, (width // 2, height // 2), (100, 50), 0, 0, 180, (0, 0, 255), -1)
# Polygon
pts = np.array([[10, 5], [20, 30], [70, 20], [50, 10]], np.int32)
pts = pts.reshape((-1, 1, 2))
img = cv2.polylines(img,[pts], True, (0, 255, 255))
# Text
font = cv2.FONT_ITALIC
cv2.putText(img, 'OpenCV', (10, 500), font, 4, (255, 255, 255), 3, cv2.LINE_AA)
cv2.imshow('image', img)
This is how it looks like:
End Notes
This article will help you to start your OpenCV journey. You learned how to read an image, how to display it, how to save it in your local directory, and how to draw shapes in an image.
FREE VS Code / PyCharm Extensions I Use
✅ Write cleaner code with Sourcery, instant refactoring suggestions: Link*
Python Problem-Solving Bootcamp
🚀 Solve 42 programming puzzles over the course of 21 days: Link*